1-year update on how I turned Japanese learning into an alternative art education

Japanese art education, japanese art styles,Traditional Japanese arts and crafts, japanese aesthetic principles, japan aesthetic principles, learn japanese duolingo, fluentin3months japanese, japanese writing quiz, japanese hiragana, japanese katakana, japanese kanji, japanese reading practice, esperanto language,multiple choice quiz, spaced repetition system , jplt levels, italki japanese, how to type in japanese, jisho app, michiko app, how to read in japanese, japanese english dictionary , Aozora Bunko, Japanese art books, Japanese craft books, gamification in education,

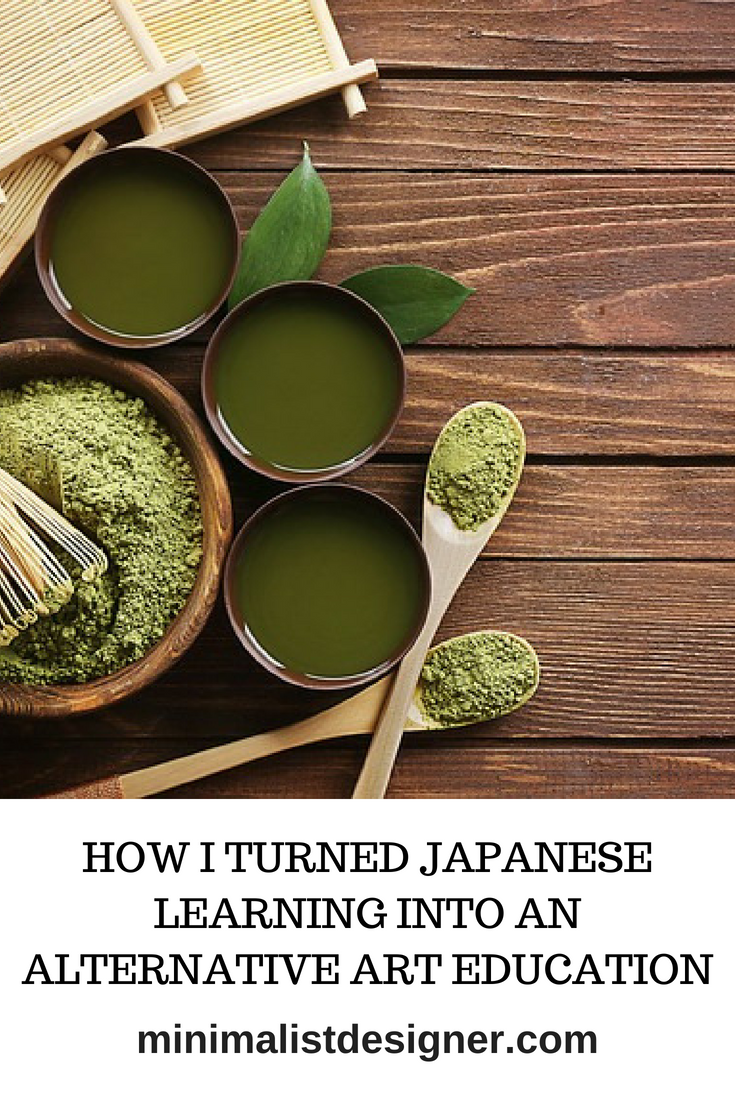
It’s been more than a year since I first took Japanese learning seriously and I’m amazed that I haven’t given up. I’m not fluent yet but I understand it better and better and I think I’ll publish 1-year updates on my progress in learning this difficult language.
I’m now somewhere between an absolute beginner and someone at an intermediate level. During this last year, there are two things I changed about my Japanese learning routine:
1. I used exams as a way to set up artificial deadlines even if I don’t count on those certificates to be useful on my resume. I don’t have any English language certificate but that hasn’t stopped me from using this language every day, in former jobs included. I only recently got a medical translation EN-RO/RO-EN certificate that proved its utility and if things go well, I’d like to apply for a similar certificate to translate from Japanese into Romanian in the art field only. I haven’t forgotten that I learn Japanese mainly to develop as an artist but I’d still like to try JP-RO art translation as a side hustle in a couple of years.
2. I didn’t read much in Japanese as I initially planned to but I kept on using Japanese to search for art on Pinterest using niche terms. The search results were so different from what I obtained with English only and it provided an impetus to keep on learning.

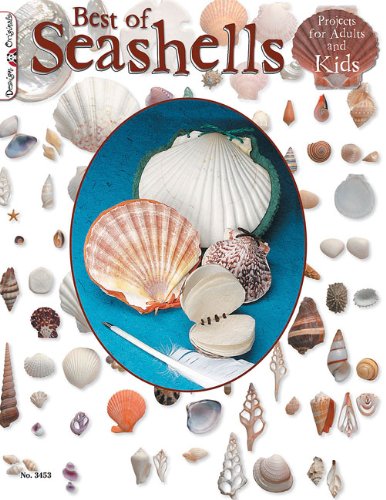
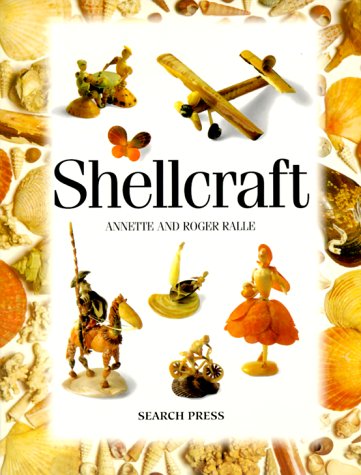
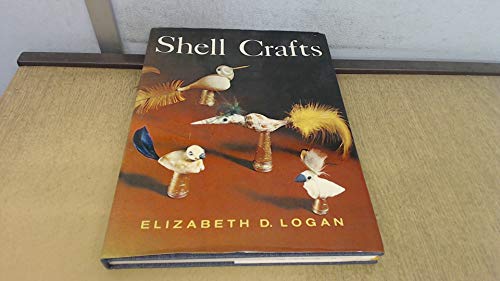
This year I had my first public speaking in Japanese in a local contest where I was allowed to pick my own theme. I talked about how different Japanese aesthetics is, how that impacted its traditional arts and crafts and how that made me finally learn this language. Actually talking about it is an exaggeration because I was so nervous that I mostly ended up reading my presentation but it was still a worthwhile experience and I’d like to participate again next year. Each contest participant had to answer one or two questions from a person in the jury depending on whether they participated as beginning or medium level speakers. The question that I received was what is my favorite Japanese art and the answer I spontaneously gave that woman helped me in crystallizing how the seashell book series will turn out, a project that I’ve been working on since 2.5 years and which took so much of my time that I didn’t even blog that much over here.

I always thought I like way too many Japanese arts but during that day on the scene, I spontaneously answered that my favorite one is Ikebana. It is sculptural. It can be mixed and matched with many other art forms like poetry (a genre that nowadays dominates my writing since I gave birth last year). It can also stand on its own without any other decoration and the classical form made from living plants only is a changing artwork unlike static stone sculptures. I also like the philosophy behind it as by using plants in different stages of life and by observing the same arrangement at different times of the day and on different days as it starts to dry out, one has an overview regarding the cycle of life and death. This is so much deeper than a boring, symmetrical bouquet of flowers.

Following this contest, I spontaneously enrolled in a Japanese course on Ikebana. It was and it still is held by the Japan Foundation. It’s free online and it combines Ikebana terminology with Japanese learning for beginners. Getting a completion certificate in the end was nice but more than this, being able to search for specific Ikebana terms by using Japanese jargon was awesome.

Last year I mentioned that I started learning this language as an alternative art education and the way this experience has directed my art was surprising. Too bad I don’t update this blog that often as I’m too focused on finishing that seashell book series. I love making art more than I love writing about it. Still, compared to the first blog post I wrote here, my art changed so much. I even wondered if I should change the site’s domain but I’ll take a decision once the book series will be finished, if not published.

Meanwhile, other exams I took and passed were JLPT N5 last December and JCAT this June. I set out to register to the JLPT every December (it’s held only once per year in Romania) and on JCAT every June so that I have two big deadlines per year to keep up with. I doubt a passed JLPT level below level N3 or even N2 could be useful at something or worth mentioning but the steepest learning curve is in the beginning and it helps so much with motivation. This year I’ll register for N4 and knowing that the exam will be here sooner than later, already made me increase the time I allocate to this language.

Yet on most hectic days, I only keep up with the streak on Duolingo and the one on Clozemaster which sums up my learning to 5 minutes per day. I thought this only allows me to maintain what I already learned but to my surprise, I progressed a bit as I received 120 points this summer after passing JCAT, a score that corresponds to a level between absolute beginner (JLPT N5) and medium learner (JLPT N4).

Other than this, I continued to play a bit with the JA Sensei app which is still awesome for practicing Kana, Kanji and vocabulary. It also has some lessons and audio quizzes but since those demand more focused time, I admit I neglected them lately. And since December will be here soon for the next JLPT level, I also started using a JLPT practice app again. I tried many of these last year, but the only one that stuck was this one.

Although during my last blog post, I thought about using italki to schedule lessons every two weeks, I ended up rarely using it because it is so difficult to schedule uninterrupted time. I ended up scheduling lessons before the Japanese public speaking contest and before the JLPT exam. Other than this, it is much easier to use apps on my phone during my downtime. Learning Japanese is a long-term investment in my personal development and it’s too easy to get distracted on hectic days. I find that mobile apps where I don’t have to wait on anybody else’s schedule help the most with keeping this daily habit.

Even if I use all these resources to improve my Japanese understanding and speaking/writing, I still love to follow up on new products and services to hack my learning on this awesome blog dedicated to Japanese learning only. Time is so scarce and Japanese is so different from everything I learned beforehand that I’m willing to try just about anything to speed up and become fluent in it, at least in the art field. Maybe when I’ll have more uninterrupted time slots I’ll even give virtual reality a try. Maybe.

How I turned Japanese learning into an alternative art education

japanese arts and crafts, learning Japanese fast

Two months ago I took one my dreams seriously. It happened while doing sketches for the seashell art photobook project when I realized how influenced I am by the Japanese aesthetics. I’ve been interested in Japanese arts and crafts for years but since I couldn’t read, write or speak Japanese this was always a second-hand experience. That dream I mentioned was becoming fluent in Japanese and ever since I started learning this language with its strange word order, grammar and writing systems, I got to think differently about a bunch of ideas and probably great things will emerge from this experience.

It was in college when I first dabbled into learning Japanese and since then I started and quit many, many times. I also made a couple of mistakes.

The first and worst mistake that I did was not taking my goal seriously. The consequence was that I didn’t personalize my learning. For example, I tried learning Japanese by speaking it first and it didn’t stick since I am a bookworm and I prefer to read. I found out about this approach from Benny Lewis (Fluent in 3 Months) and I’m sure it worked well for him, but it didn’t work for me as my motivation to learn Japanese was different. Another example is that I tried to learn its 3 writing systems one at a time through handwriting. The latter is an approach that is mentioned in just about any Japanese language textbook or mobile app with drawing quizzes. I used to write each hiragana syllable time and time again and by next week I would forget everything as if I didn’t even study at all.

The second mistake was that I didn’t learn it through a multisensory experience. I didn’t learn like a child. I didn’t combine images, audio, video and immediate feedback. Instead, I tried to learn it like an adult with grammar lessons and lots of handwriting practice and it got boring.

And since it got boring, I made a third mistake in that I wasn’t consistent enough. I wanted fast results to get to the fun part (Japanese art books) and I didn’t get them.

If you happen to learn Japanese or any other language, the following resources may give you plenty of ideas on avoiding making the same mistakes as I did. None of them is enough on its own but each of the ones I recommend has its merits. As a polymath, I tend to always look for tips and hacks and I am willing to try just about any learning tool but in order to progress with Japanese I intentionally introduced one resource at a time.

I started with Duolingo because as crazy as it sounds, I read somewhere that Duolingo had an Esperanto course (yes, Esperanto!) and I was curious to see how Japanese would be taught there. I also wanted to start with a mobile app that included sounds, images, multiple choice tests and Duolingo fit into that. There are a couple of things I got from this app:
1. I got over my fear to use all the 3 writing systems that Japanese has. I was basically never given a chance to start with hiragana, katakana or kanji. I was simply introduced lesson by lesson to Japanese words and sentences.
2. I got used to the strange order in which the Japanese place words in a sentence. I didn’t always understand why a word I thought I knew was slightly different or why a particle was placed in a certain spot and not another but it worked. Lesson by lesson I developed an intuition on how I should build a sentence in Japanese.
3. It helped me greatly with motivation. Apart from receiving daily email reminders to get back to Japanese, Duolingo has a virtual currency called lingots. For the Japanese course specifically, there aren’t many things I can spend lingots on but I can place a bet by buying a streak wager where I spend 5 lingots and I can earn double that if I don’t miss on my goal every day for a week. Buying that streak wager every week helped me build a daily habit of practicing Japanese.

I kept my streak on Duolingo but as days got by, I wanted to try something else. What I lacked most was some kind of multiple-choice quiz to learn kanji. Out of all the Japanese learning apps that I tried, I liked JA Sensei most. Japanese learning turned into a game here as well. In the beginning, I used it for its hiragana, katakana and kanji quizzes. The app includes around 2,000 kanji which are used in elementary and secondary schools in Japan. Those quizzes can test either recognition or writing. I didn’t use the latter because I’m not interested in handwriting in Japanese. I barely handwrite in English or Romanian.

Although I used this app mainly for its writing system quizzes, I also started doing lessons there. Grammar is well explained and there are some interesting culture bits as well. I like that it uses a spaced repetition system so items that I don’t know well are reviewed more often. If I don’t have time for a new lesson, I’ll simply open this app and start reviewing kanji, kana or vocabulary. Since reviewing is more important for learning than simply engulfing new words and concepts, the app also rewards the former with more points. Another thing that I like about this app is that its multiple grammar sheets are annotated depending on the JLPT level and so is my score depending on how many points I earn. Right now I could care less about JLPT testing but if I decide to register for this exam which is held only once per year where I live, it’s good to know which level I’m at.

Days passed and I was making some progress with Duolingo and JA Sensei but I had to challenge myself even more 🙂 I’ve noticed on Duolingo that I could also earn some points if I played games with Japanese words but I only received them if I typed in Japanese. That was a problem I solved by downloading the Google Japanese keyboard. It wasn’t easy to learn how to type – after some time, I realized I started from hiragana only and then the keyboard would display katakana and kanji suggestions so that the words on the screen would be displayed properly. The more I typed in Japanese, the more frequently those kanji I previously used would be displayed.

Learning how to type in Japanese served me well as I got back to italki, an app where I could do free language exchanges, get my writing corrected as well as sign up for lessons with native Japanese people. I already did the latter and it was more affordable than I expected. There are two types of teachers there: people with credentials and experience in teaching a foreign language and natives with whom you can do conversation. I chose the latter and it was awesome and awkward at the same time. It was awesome to speak with a Japanese person without traveling all the way to Japan and it was awkward to find enough words to make up intelligible sentences. Nevertheless, I won’t quit. I will probably continue such lessons once every two weeks. It’s good for trying things outside my comfort zone and I may also remember words better if I communicate in real time with a person.

And since visual art and traditional crafts are what drawn me towards learning Japanese in the first place, I make extensive use of the Japanese keyboard plus the Jisho dictionary to search for specific Japanese keywords on Pinterest. This way I not only improve my vocabulary but the images I find there makes it more likely to remember those concepts and retrieve them later on.

All this progress was nice and encouraging but there was still no sight of Japanese books on the horizon. During my trip to Japan I bought a couple of bilingual Japanese-English books which I haven’t touched yet. I don’t understand most kanji there and searching for the meaning of a kanji in print would take me too much time. I thought there must be a more efficient solution to be able to read whatever text I want with what little Japanese I know and there is one as long as I stick to digital texts for the time being.

Any Japanese text is manageable with some furigana display (for unknown kanji) and with a good Japanese-English dictionary. I couldn’t make these work on my ebook reader (yet), but I found a good app instead: the Michiko app. With it I can import texts from files on my phone, from Aozora Bunko (a Japanese digital library of public domain texts) and from the clipboard. I especially appreciate the latter to read articles from Wikipedia and blogs on topics of interest. It can display rōmaji only, rōmaji with hiragana, kanji with furigana and it’s also available for languages other than English. Besides, it has a text to speech option.

I now reached a point where I make daily use of Japanese and for the first time in my life, I think I’m on the right path to become fluent in it. This doesn’t mean I don’t look for additional hacks to learn it even faster. If you know of any such resource for learning Japanese or learning a foreign language in general, I’d love to hear it!

Planning my first photo book

Planning my first photobook, photo book

Over the years I’ve pruned most of my print books in favor of ebooks since I needed space to live, ease of moving around and my reading habit didn’t seem to slow down as years went by. Yet there were a couple of them that I kept because of their beautiful photos. These books were usually on obscure topics I’d promise myself to get back to when I’ll have more time. One of these topics was creating a first photobook myself so lately I’ve picked up a copy of “Create Your Own Photo Book” by Petra Vogt.

Although I haven’t finished all the seashell sculptures I’ve sketched for such a project, I’m glad I read this book since it already influenced my artistic direction. I was familiar with print-on-demand options from my previously written books, but producing a photo book is another ball game. I was getting lost among the many printing options and while I can recommend this book because of the detailed comparison among service providers, the nugget of wisdom I derived from it is the wizard from photobookgirl.com  which takes me step-by-step to narrow my selection depending on the type of photo book project I’m working on.

There are other ways in which this book influenced the direction of this project, for example by the types of photographs I take. I now find myself shooting details and close-ups all the time to use as possible background photos in the book. Deciding on a coherent color scheme is another idea I got from this book and this influenced future seashell work. It also didn’t cross my mind that I could include scans in such a book and now I just may.

I’m still not decided on which software to use for the book’s layout. I already started playing around with drafts on Blurb, Scribus and Canva. Admittedly, the latter is not ideal for a photo book since I can’t add pages in a double-page spread format and I can add a maximum of 30 pages only, but I find it so easy to use that it was my first option for trying to narrate a visual story through the photographs I have until now.
There are way more decisions to take when creating a photo book than I knew of, but I love the challenge and I’m so glad I read this guide on the topic before finishing the sculptures and the photos.

Update: I published a full photo book series since I wrote this blog post. If you’re curious it all looks like, take a look here.

What started my journey into photography

photography starting out, Photography beginner tips, Starting photography camera, Getting into photography what camera, How to start doing photography professionally, Photography why is it important, Photography how to start, Photography how to get started, Seashell photography, How I got started in photography, What inspires me as a photographer, Photography inspiration ideas, What inspires my photography, Photography art or craft, fine art photography, product photography, macro photography, underwater photography, Getting started with photography, What got me started in photography, What made me get into photography, What inspired me to get into photography, What started my journey into photography, What inspired my journey into photography,

I never thought I’d one day write a blog post on starting my journey into photography, mainly because I was resistant to the idea of photography as an art form for a long time. I knew photography was more than pressing a button, but since the content of any photo is made of objects or people already created, it didn’t seem like it was that much of an art form. Photography is very different from drawing or composing music where you literally start with a blank canvas or sheet.

And yet as months went by, I moved away from designing 3d printable models on my laptop to crafting seashell artwork with my two hands and in the process, this blog appeared deserted. That was until I realized that photography is the medium that could bridge the offline world to the online one. Photography could also be a shortcut to 3d scanning what I craft and turning those 3d models into 3d printable ones.

Having planned on releasing a photobook series with what I created until now, I thought I’d just hire a local photographer. Things looked very simple at this stage and I got to focus on sculpting. But I started sketching ideas of props and lights and step by step I realized how many creative decisions go into shooting just one photo. The more I brainstormed how this project would end up, the more interested I got about learning photography myself. I also needed a creative outlet that could be practiced in bits of time here and there as I welcomed home my first child. No matter how difficult the newborn stage is, I still need to create just as I need to breathe and photography fits the bill.

A photo camera is an artistic tool just like a brush or a piano and yet photography is an art form that depends on equipment much more than drawing or singing. I refrain from buying multiple gadgets since they are difficult to recycle and extremely polluting, but I needed to make an exception now as both my smartphone and point-and-shoot camera were very old and limited in features. There are so many niches in photography which I’d like to explore, yet for the moment I restricted myself to product/fine art/abstract photography and bought my first DSLR camera. Once I’ll get some practice with it, I’d love to try underwater and macro photography.

One mistake I did when I dismissed photography as something worthy of learning is that I didn’t consider all possible niches of it. Art is so personal and there are more things to shoot than buildings and portraits. The latter were the topics I associated with this art and I don’t find them particularly interesting. But I love still life photography – especially close-ups, fine art and anything filmed underwater. Hence when the time came to start playing with my new camera, I started taking pictures of something I hold dear: my collection of seashells – the two examples seen below were bought from street vendors on Enoshima Island, Japan.

Enough about me, how about you? What do you like to take pictures of? If you have one, please include a link to your photos.

Japanese wonder shell photography, Japanese wonder shell photos, seashell photography,
Thatcheria mirabilis Japanese wonder shell against purple background Copyright © 2018, Anca Ioviţă

Epitonium scalare photos, Epitonim scalar photography, seashell photography,
Epitonium scalare in twilight
Copyright © 2018, Anca Ioviţă

The 5 best sculpting materials for modeling, molding and casting without a kiln or oven

The 5 best sculpting materials for modeling, molding and casting without a kiln or oven

Although I started this blog thinking I’d focus mostly on 3d printing, I changed direction as I realized I prefer to test out ideas through crafting and not while sitting at my desk trying to concoct ideas directly on my laptop. I love technology, but only for developing ideas and not when coming up with them in the first place. I guess I needed haptic feedback when creating stuff. During my latest blog post I was telling you about my plans in embedding pieces from my seashell collection into artwork and quite soon I may post some preliminary results. [UPDATE: the project is ready, just check out the home page on marine Ikebana poetry.] I worked at this project every single day and among the many mixed media art techniques I tried during these last months, I also got to experience working with a couple of sculpting materials.

Two months ago I took a pottery class during which I used a pottery wheel for the first time. The fee included the necessary firing in the kiln as well and I may go back in the future to model some more stuff and pay for the kiln firing, but it seems so inconvenient and distracting to create in a place outside my home. I also found it difficult to find a place to rent a kiln where I could take dried modeled clay objects so for the moment I put this direction on standby.
Another thing I tried a couple of years ago is polymer clay. I fired my creations in a microwave oven I wasn’t using for food anyway. These days I only have the regular oven for food and I have no intention to use this one to fire non-food items so I’m not getting back to this material.
This is how I started searching for malleable materials to model, mold and cast. If you’re searching for something similar, read on.

Plasticine was the first such material I tried. It felt odd to buy it in the supermarket because I’m not a kid anymore, but later on I found out it is frequently used in animation! There are whole movies made where characters are modeled out of plasticine only and since this is an oil-based clay, the objects don’t dry out so they can be reshaped as needed depending on the storyboard. (There are biodegradable kid-safe versions like this one if you wanna try: https://plastefina.ro/) Plasticine comes in different colors and while it is tempting to use many of them in an object, it is too easy to mix them in undesirable shades of color if reshaping is needed. I find plasticine to be great for immediately visualizing how a shape might look like in the real world, but since I needed to use solid elements in my artwork I decided to try something else.

That something else turned out to be air drying clay. I never tried to mix it with colors before modeling since I prefer to focus on the shape first and paint it after drying. The one I use is gray when wet and it turns white after drying. For best results I do my best to complete the shape in half an hour – if I’m slower than this, I could always add some water to soften it a bit, but it cracks easily so I try to avoid this step unless I’m looking forward to that as a visual effect. One downside of air drying clay is that it’s not waterproof, something which I ‘fix’ by adding a layer of epoxy varnish.

Speaking of epoxy resin, this has become my favorite material to work with. I may use air drying clay for adding tiny decorative elements to what I create, but epoxy resin always forms the background shape. I use it for casting with a diverse range of molds, but also as a varnish to coat the final objects. Its transparency works so well in underlining the beauty of seashells and it also allows for lots of negative spaces in artwork, an effect I love as a minimalist. The only downside when casting epoxy resin is the formation of air bubbles, something I still struggle with so these days I mostly use this material for coating or I cast tiny shapes only.

I have used a bunch of common household objects as molds and lately I also bought two more silicone rubber ones. Crafting my own molds from silicone rubber powder which can be found in just about any arts and crafts store is definitely on my to-do-list. One way I previously tried to make my own molds was by mixing common silicone used for sealing with soapy water. There are countless tutorials you can find on the Internet using this method. While cheap and fast, I stopped using this method because I couldn’t stand the smell of vinegar from the silicone in soapy water.

A final material for modeling which needs no kiln or oven is papier mache. You basically mix shredded paper with some adhesive like glue or starch. There are also lots of homemade versions of paper clay, cold porcelain and playdough where you mix flour or starch with something like glue, lotion, hair conditioner, dish soap etc and maybe add a little bit of oil to prevent the clay from sticking to the hands while modeling. For the moment, I still have a bunch of air drying clay to finish so I didn’t try any of these versions but I may in the near future, especially if I’ll do larger projects one day.

Have you tried any other malleable material which needs no kiln or oven to maintain its shape?

The Best Books on Seashell Crafts

The Best Books on Seashell Crafts

I’ve been an on and off collector of seashells all my life. It’s not that there was a time in which I didn’t find the shape of a seashell the most beautiful one on Earth, but as I became more minimalistic I preferred to keep a hardcover encyclopedia of seashells in my home library rather than gather even more seashells. But these days I decided to combine the seashells I already have into delicate sculptures or simply to decorate household objects with them. I’ve seen my share of kitsch seashell crafts. Just because one seashell is beautiful, it doesn’t mean that adding lots of them on an object will somehow impart aesthetics to it. So I’m now trying to use my seashells in such a way that their beauty would be underlined rather than diminished. If all goes well, I could even have a photo book series in plan with my best creations.

[UPDATE: it’s already published! See covers of Volume I-V below:]

Until then, here are the top seashell craft books I could find.

While not exactly a seashell craft book, if you’re an absolute beginner regarding seashells I highly recommend starting with a free ebook download of ‘Collecting shells in times of Internet’ by Guido T. Poppe, an experienced malacologist (mollusk scientist), shell dealer and multiple book author. Although considered two different markets, seashell collectors and seashell artists intersect all the time and what starts as one ends as the other. What I liked about this ebook is that it gives you some background on the habit of collecting seashells (did you know how many well-known naturalists, including Charles Darwin, were seashell collectors?), it teaches you what to look for in a seashell to judge its quality and my favorite part: an annotated bibliography with the main niche books and magazines on seashells (I had no idea there were so many, do you know how long my book wish list is now?!). The final part with photos of seashell collectors worldwide can serve as inspiration as to how they organized their (growing) collections. In most cases, I noticed their collection occupied one cabinet only. Sometimes even less if collecting microshells. On my last trip to the seaside, I picked up a tiny bag with sand and as I got home, I’m mesmerized by the beautiful and tiny microshells I found there. If I’d have a microscope, I may find even more beauties. Maybe I’ll rent one when I’ll have sand samples from several places worldwide.

Coming back to books containing seashell craft projects,  ‘Shell Art: A Handbook for Making Shell Flowers, Mosaics, Jewelry, and Other Ornaments’ by Helen K. Krauss is quite an old book on a topic that still captures the imagination of people living today. It was published as hardcover in 1965 and paperback in 1976. If you prefer written explanation rather than catchy photos and drawings, this book could be just what you need. It’s still a good reference book on how to combine seashells into 50 types of branches, foliage, flowers and many other ornaments. Since it was published so long ago, there is a good chance you could find it in libraries. Alternatively, you can find it used on Amazon and Barnes & Noble as I couldn’t find it in the publisher’s store anymore.

Available only in hardcover and published in 2002, ‘Shell Chic: The Ultimate Guide to Decorating Your Home With Seashells’ written by Marlene Hurley Marshall with beautiful photography by Sabine Vollmer Von Falken is more like a coffee table book for inspiration rather than a collection of tutorials, although you will find details on the different types of glue to use with seashells. If you have lots of seashells collected throughout the years, there is a big project here you could replicate: a bathtub! Check out the book on the publisher’s website or on the photographer’s one if you’d like a signed copy. Needless to say, you can find it in most other online bookshops.

the best books on seashell craftsPublished as paperback only in 2015, ‘Coastal Crafts: Decorative Seaside Projects to Inspire Your Inner Beachcomber’ by artist, author and photographer Cynthia Shaffer, this book contains lots of detailed, easy-to-follow instructional projects, great photos as well as the basics on working with seashells and other coastal natural materials like sand, driftwood, sand dollars and many others. You can check out the book on the publisher’s website as well as on most other online bookshops. And while not focused on seashells specifically, you can also check out the author’s blog here.

A hardcover published in 2001 by Sterling/Chapelle, ‘Decorating with Seashells’ by Anita Louise Crane contains lovely photos and easy-to-follow instructions of seashell decorations ranging from picture frames to flower pots to candles. You can check out this book on several online bookshops like ThriftBooks, Alibris, Barnes & Noble or Amazon. An experienced craft book author, you can check the rest of her books here.

Originally published as a hardcover in 1977 by Bobbs-Merrill, ‘Shell Craft’ by talented author Virginie Fowler Elbert was reissued by Dover Publications in 1993 and it is now available as an ebook, paperback and hardcover. This book is a good mix between an introduction to the use of seashells throughout time, a reference on the basics of seashell craft and lots of additional ideas like embedding seashells in resin, doing shell prints as well as several inspiring projects with clear instructions illustrated in black and white sketches. You can check out the book on the publisher’s website or from Kobo, Barnes & Noble, Amazon.

I wish I could have mentioned more indie published books in this list, but from what I could find ‘Shellcrafting’ seems to be the only one. Anne Joffe’s book was formed by her huge experience in seashells as a collector, a crafter and a shell shop owner. The projects contain a list of required shells and the photos are clear and crisp. The projects are also quite diverse ranging from flowers, animals, airplanes, ornaments to decorated picture frames and flower pots. You can check out the book from a range of online shops such as MDM Shells & Books, Amazon or AbeBooks. If you happen to live in or travel to Sanibel, Florida, USA, you can also visit the author’s two seashell shops at http://sanibelshellcrafts.com/

Available as paperback or hardcover, ‘Shells (New Crafts)’ by Mary Maguire is a 1998 seashell craft book containing 25 interesting projects with step-by-step photos. I always appreciate it when art and craft books are written by mixed media artists because they bring such a breadth of knowledge and originality to what they write about and this book makes no exception. The author wrote lots of other craft books, but this is the only one focused on seashells only. You can check out the book at several online shops including Amazon, AbeBooks and Barnes & Noble.

A short paperback of only 20 pages, ‘Best Book of Seashells: Projects for Adults & Kids’ was written by Suzanne McNeill and published in 2010 by Fox Chapel Publishing. It contains instructions on how to clean seashells and which are the basic supplies for this craft. You can check out the book at Waterstones or Amazon.
The author wrote lots – and I mean lots – of books on crafts – if you’re curious, you can check out her blog here.

Other books on seashell crafts are:

Art from Rocks and Shells: With Projects Using Pebbles, Feathers, Flotsam and Jetsam’ by Gillian Chapman and Pam Robson (Paperback, 1995)

Shellcraft’ by Annette Ralle and Roger Ralle (Paperback, 2000) – also available in French

Neptune’s treasures: A study and value guide’ by Carole Smyth and Richard Smyth (Paperback, 1996)

Crafting on the Go: Shells’ edited by Trisha Malcolm (Hardcover, 2003)

Shell crafts’ by Elizabeth D. Logan (Hardcover, 1974)

Shellcraft‘ by Cleo M. Stephens (Paperback, 1977)

This blog post would be incomplete if I didn’t mention one of the most original use of a seashell as the actual cover of a book – check out Lauren Bishop’s ‘Capsule’ project at http://www.laurenabishop.com/capsule.html

Do you know of any inspiring seashell craft book I could add to this list? Tell me in a comment below!

*If you are the author and/or copyright holder of a book on seashell arts and crafts, I’d love to review your book(s) on this specific topic on a dedicated blog post. Please send me a review copy by contacting me here! I only do this because I like the topic, so there is no charge or payment involved.

Top 3D modeling methods for 3D printing

What I learned from Japan is that anything can be made into an art. Anything, no matter what your field of work is. Any type of design, any type of object manufacturing, any service you share with others. It doesn’t matter whether you or others see yourself as an artist. Because in a way, we all are.
It is an art not only to create a 3D design on your device, but also to choose a certain method of designing it. There is no right way to design a 3D model, but depending on what you want to achieve, there is an easy way and a hard way. One way that will lead you faster to your goal and a slower one. A precise method of designing and a freeform one.

The most precise method of designing an object is through parametric functions. You write down those functions and by varying the parameters, you obtain the desired object. If you want to bring your idea to reality by literally printing it, this is the best method. Any mesh repair that you may do before sending it to the 3D printer would be minimal . Unfortunately, if your model is very complex or if it is made of several simpler pieces, it is much more difficult to apply. There are parametric functions for designing a seashell this way, but how about a human figure or a cat?
The other extreme is freeform organic modeling as in virtual sculpting. You start with a primitive shape like a cube or a sphere and you start adding or subtracting material from it. After more or less such steps, you will see your idea on the screen. Making it a reality may be much harder though. Most probably, your mesh must be edited for it to be manifold or for it to have a less steeper slope and so on – please see this post on how to prepare a 3D model for printing. But the advantage of this method is that you can use it without much prior thought. You can just start sculpting without planning anything at all and decide on the way which way to play with the (virtual) material at hand.
And then, between the precise modeling of parametric functions and the organic modeling of virtual sculpture, lie the usual ways of 3D mesh modeling. Those we are most likely to be familiar with. Like drawing a profile and extruding it. Or drawing half a profile and spinning it. And then applying all sorts of changes to the mesh like beveling, triangulation, scaling and rotating it, smoothing it or changing its density.

You can use any of these methods in Blender. Presumably, Openscad is much better at parametric modeling. But with the add-on of extra mesh objects in Blender, I find it much easier and faster to play with parameters by inputing known Z or XYZ functions.
Blender has a sculpting mode available and this feature is what first attracted me to this piece of software. Previously working with precise ways of 3D modeling (like during engineering school and later), I found it awesome that I could simply play with the virtual material on my screen without making a full mess in my house like if I’d have taken sculpting with real materials like clay or metal or any other. Because, you know, I like empty spaces where I live.


5 ideas for eco-friendly 3D printing

There is something really empowering in coming up with an idea and bringing it into the real world. Traditionally speaking, the bridge that took you from idea to accomplishment was filled with red tape and high costs. In some fields like drug research, this is still the case. But progress takes place whether we like it or not. And while regulations may not disappear overnight, high costs certainly do. Peter Diamandis was right in his ‘Abundance’ book: the world is getting demonetized and dematerialized. We need less money and less space to store our stuff. And climate change could slow down for those two reasons.
3D printing is a technology that has the potential to be eco-friendly, but it is not there yet. Not all types of 3D printers make efficient use of raw material. And all of them use lots of energy to function. Being a minimalist, I use 3D printing services locally and for the time being, I refuse to own such a machine. For a long time, the only available materials to print were plastics. Given their slow decay rate, I don’t feel like using plastic for iterative designs.I’m too young to not care about climate change and I don’t want the legacy that I leave behind to consist of a bunch of plastics floating in the oceans.

So here are 5 ideas to make 3D printing eco-friendly today:
1. Check your CAD design and check it again . Use appropriate materials for your budget, the detail you need and whatever environment that object is going to be used in. Think about the long-term use and reuse of that object.

2. Use 3D printing services – local ones as much as possible. One handy solution I use is 3dhubs.com where I upload the model and I search for 3D printing services according to the nearest zip code and any type of 3D printer and material I’m interested in.

3. Plastics are still widely used because they are cheap, the main ones being ABS and PLA. Desktop 3D printers use plastics only and melting them emits all sorts of toxic fumes. I only printed in polylactic acid(PLA) which is a type of plastic derived from corn. I’m glad I didn’t use it for iterative designs because while biodegradable, it does so slowly in hundreds of years. And being made of corn and not petroleum, I can’t just toss my bad designs to the recycle container. And I know of no composting facility close to where I live. But it’s still the better option among the two.

4. I try to move away from PLA altogether and try easily recyclable materials like metals.  The problem with metals is that it needs powder 3D printing and that can dramatically increase costs unless one uses the services of an industrial 3D printer as needed. Not to mention that some metals themselves are expensive. I’m also interested in trying ceramics in the near future.

5. Probably, the most eco-friendly material would be food. What is more biodegradeable than that? But printed food must be both tasty and healthy. The nozzle must be used with food only and both it and the surface on which the ingredients are extruded must be made from food grade materials themselves. Unfortunately, some extruders contain lead. For the time being, it’s much better to create 3D printed molds and use those for custom-shaped concoctions like chocolate bars.
If you need food grade materials, you can try porcelain from Shapeways or ceramics from iMaterialize.

In the end, the only eco-friendly thing about 3D printing is the ability to modify designs ad nauseam on a computer or mobile phone and print on demand only. And that is no small feature either! By the sheer of its on-demand and on-the-spot character, 3D printing has the potential to be more eco-friendly than mass production. But it’s not there yet. Hopefully, these 5 ideas will help you choose appropriate materials and take the long-term use and reuse of the 3D printed objects into consideration.
If you know of any interesting and eco-friendly new materials, I’d love to hear from you!

How to prepare a CAD model for 3D printing in Blender

When I first tried to 3D print a CAD model, I made the mistake of sending the file ‘as is’ to a local 3D printing service. They sent it back to me and I didn’t really understand what was wrong with it. I mean, it looked fine on my computer. Worse, the file was a 3D reconstruction model out of several photos I took, which means it was probably full of holes and no 3D printer could work its magic on it. Months passed and I got better at it. If you are a complete newbie at this whole 3D printing stuff, this tutorial may save you the headaches I had while learning how to prepare a CAD model for 3D printing.

CAD models come in many formats and they can be created in many different types of software. For a complete list, check out this Wikipedia article.  While in engineering school and later on my first engineering job, I learned CAD by trying out Catia and Solidworks tutorials. Needless to say, it never caught on with me. It felt too mechanical and stiff to try new ideas. It was all a trial-and-error process. That was until I found Blender. Its open-source philosophy and its easiness for modeling organic forms was just what I needed. Blender can have a steep learning curve because you have to rely on many shortcuts or hotkeys, but once you learn them, you can do a lot of interesting stuff with it. And coming back to the topic here, Blender has a toolbox that greatly simplifies 3D printing final steps.

CAD models come in many formats. Most 3D printing services will display the type of format they want you to upload on their websites. I mostly use .stl files. For this tutorial, you can download my first model that I 3D printed: a flower vase.

Here are the steps to make sure any CAD file is 3D printable.

Step 1

Download Blender. It is available for Linux (my favorite!), Windows and Mac OSX. Install it and get back to read step 2.

Step 2

Once you open Blender, a default cube will be visible. You can delete it by typing X. Import your file (File/Import/STL files) and save it as .blend (File/Save) while you work on it.

3d printing file preparation in Blender

Step 3

Make sure the add-on 3D Print Toolbox is active. Go to File/User preferences/Addons and check whether the tool is enabled. If it’s not, type ‘print’ and the 3D Print Toolbox should be enabled as you see below. Don’t forget to save the new setting before moving on.

screen1-3d-print-toolbox

You’ll now have the Print3D toolbox active by scrolling in the left part of the screen (activate the ToolShelf by typing T if necessary).

screen-3d-print-active-path4197

Step 4

No matter which 3D printer type you’ll use, the 3D model must be manifold. This is a fancy way of saying the surface is all closed. Just imagine that you’d fill that closed shape with water. If it leaks, it’s not manifold.

Here is an easy way to check that in Blender: click on Solid in the Print3D Toolbox. The output that you wanna get is made of:
Non Manifold Edge: 0
Bad Contig. Edges: 0

If you don’t get this result, your mesh is not manifold.

For illustration purposes, I deleted a face from the mesh below. By clicking on Solid in the Print3D Toolbox, I get a non-zero number of manifold edges and by clicking on the error, the missing parts are highlighted. Depending on the complexity of the mesh, you can correct these holes by adding or subtracting vertices, edges or faces. You can use the F hotkey to add edges or faces depending on your selection mode (vertex or edge).

screen-non-manifold-edges-path

To edit a mesh, you have to get out of Object mode and into Edit mode.
Once in edit mode, you can pick one of the following selection modes: vertex, edge or face. You can’t add/delete edges if you are in vertex selection mode and vice versa.

screen-editing-mode-path4265

Step 5

The next thing you need to have in mind is minimum thickness. In other words, the walls of your mesh must be at least equal if not larger than the minimum thickness of the layer deposited by the 3D printer you’ll use. Any 3D printing service will mention the printer’s resolution on their website – if they don’t, ask.
You can check this by entering the desired value in the text box on the right side of Thickness in the Print3D Toolbox. Be careful about units here as Blender uses 3 types of units: Blender units, Imperial and Metric. If necessary, you can modify this setting on the right side of the screen by going to Scene/Units as you see below. Most of the time though, I just work on Blender units and I select the metric unit when I upload the model on the 3D printing service websites.
So after entering the desired value, click on Thickness. If everything is OK with your mesh, you should get the following output:
Thin Faces:0

If not, the add-on will show you exactly which faces you need to correct as you see below.

screen-thin-faces-path9340

You can modify the wall thickness in several ways:
-select all faces by pressing Ctrl-F, select Solidify and on the left side of the screen enter the desired thickness
-scale the whole mesh by pressing on Alt-S with even thickness turned on
-as a last resort, you can manually correct the wall size by moving edges and faces around

screen-solidify-path8721

Step 6

Depending on the 3D printer type you’ll use, now comes the fun part.

Basically, there are two ways of using materials to 3D print:
-melting solid materials which are then extruded as layers, the latter hardening at room temperature. A related method implies cutting sheets of solid material and laminating them together.
-curing liquid materials or binding powders
Within the first category, you may need to add support structures or at least change the orientation of the piece before printing it if your mesh contains overhangs. Support structures need to be removed or dissolved after printing the model.

But this is not necessary for the second category as the surrounding liquid or powder material forms the structure itself.
You can set the maximum angle for overhangs in the Print3D Toolbox, the default being at 45 degrees.

For more options, you can check the documentation of this addon here.

Step 7

A fast way to repair your mesh is to use the Cleanup options from the Print3D Toolbox:
– isolated which deletes isolated vertices, edges or faces
– distorted which smooths down or tesselates faces connected by an angle larger than the one you set here (by default it’s 45 degrees). This will increase the number of faces your mesh will have, which will increase the size of your file.

Step 8

Finally, check on the model’s volume before sending it to the printer. The lower this number, the more you’ll save on material costs.

You can decrease a model’s volume in several ways:
-scaling it by using Alt-S to the desired size
-scaling it to the desired volume by using the Print3D Toolbox option
-removing internal geometry of the mesh while taking care of keeping it manifold in the end

That should be it. Now your model is ready for 3D printing. If you have any questions, please leave a comment below!

For the time being, I don’t own a 3D printer at home and neither do I plan to. I value my open space. But I also care about printing locally and the most efficient way I found to do just that is to enter the zipcode on 3dhubs.com , upload the model(s), choose a material and a 3D hub from the available ones and you’ll get a price estimate for each of them. If you like what you see, you can order the print and have it shipped to your place or pick it yourself. This website saved me a lot of time and money on shipping costs by printing locally without having to go through several options as they were all in one place.