
Although I started this blog thinking I’d focus mostly on 3d printing, I changed direction as I realized I prefer to test out ideas through crafting and not while sitting at my desk trying to concoct ideas directly on my laptop. I love technology, but only for developing ideas and not when coming up with them in the first place. I guess I needed haptic feedback when creating stuff. During my latest blog post I was telling you about my plans in embedding pieces from my seashell collection into artwork and quite soon I may post some preliminary results. [UPDATE: the project is ready, just check out the home page on marine Ikebana poetry.] I worked at this project every single day and among the many mixed media art techniques I tried during these last months, I also got to experience working with a couple of sculpting materials.
Two months ago I took a pottery class during which I used a pottery wheel for the first time. The fee included the necessary firing in the kiln as well and I may go back in the future to model some more stuff and pay for the kiln firing, but it seems so inconvenient and distracting to create in a place outside my home. I also found it difficult to find a place to rent a kiln where I could take dried modeled clay objects so for the moment I put this direction on standby.
Another thing I tried a couple of years ago is polymer clay. I fired my creations in a microwave oven I wasn’t using for food anyway. These days I only have the regular oven for food and I have no intention to use this one to fire non-food items so I’m not getting back to this material.
This is how I started searching for malleable materials to model, mold and cast. If you’re searching for something similar, read on.
Plasticine was the first such material I tried. It felt odd to buy it in the supermarket because I’m not a kid anymore, but later on I found out it is frequently used in animation! There are whole movies made where characters are modeled out of plasticine only and since this is an oil-based clay, the objects don’t dry out so they can be reshaped as needed depending on the storyboard. (There are biodegradable kid-safe versions like this one if you wanna try: https://plastefina.ro/) Plasticine comes in different colors and while it is tempting to use many of them in an object, it is too easy to mix them in undesirable shades of color if reshaping is needed. I find plasticine to be great for immediately visualizing how a shape might look like in the real world, but since I needed to use solid elements in my artwork I decided to try something else.
That something else turned out to be air drying clay. I never tried to mix it with colors before modeling since I prefer to focus on the shape first and paint it after drying. The one I use is gray when wet and it turns white after drying. For best results I do my best to complete the shape in half an hour – if I’m slower than this, I could always add some water to soften it a bit, but it cracks easily so I try to avoid this step unless I’m looking forward to that as a visual effect. One downside of air drying clay is that it’s not waterproof, something which I ‘fix’ by adding a layer of epoxy varnish.
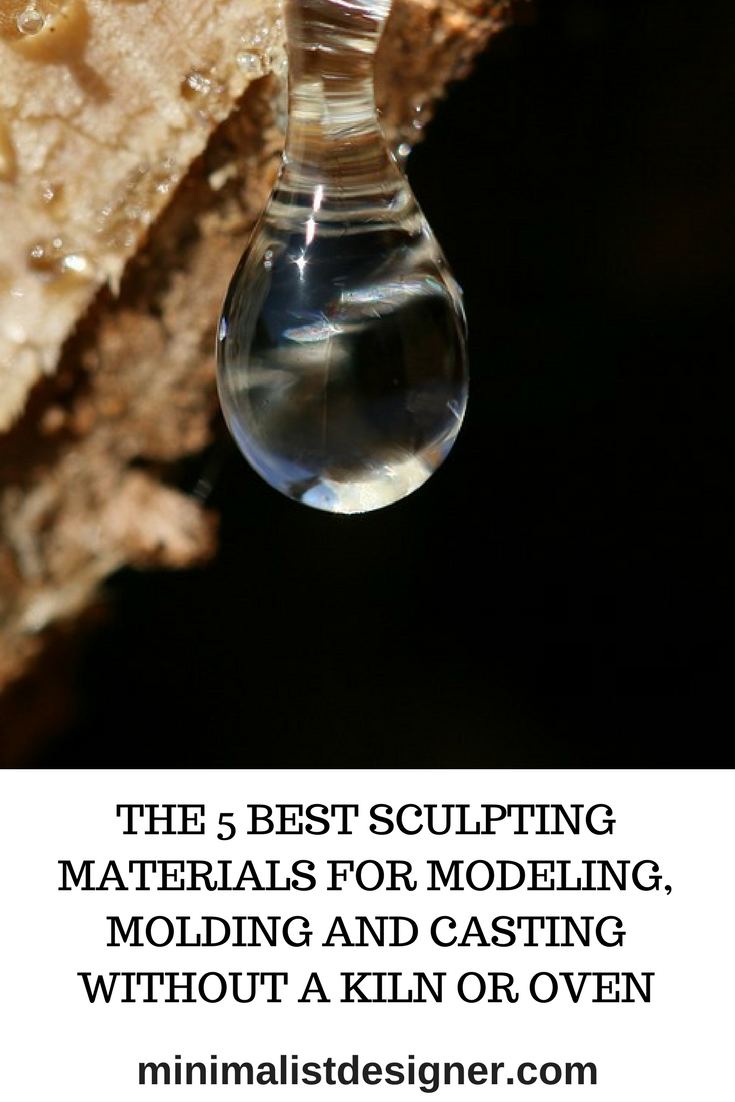
Speaking of epoxy resin, this has become my favorite material to work with. I may use air drying clay for adding tiny decorative elements to what I create, but epoxy resin always forms the background shape. I use it for casting with a diverse range of molds, but also as a varnish to coat the final objects. Its transparency works so well in underlining the beauty of seashells and it also allows for lots of negative spaces in artwork, an effect I love as a minimalist. The only downside when casting epoxy resin is the formation of air bubbles, something I still struggle with so these days I mostly use this material for coating or I cast tiny shapes only.
I have used a bunch of common household objects as molds and lately I also bought two more silicone rubber ones. Crafting my own molds from silicone rubber powder which can be found in just about any arts and crafts store is definitely on my to-do-list. One way I previously tried to make my own molds was by mixing common silicone used for sealing with soapy water. There are countless tutorials you can find on the Internet using this method. While cheap and fast, I stopped using this method because I couldn’t stand the smell of vinegar from the silicone in soapy water.
A final material for modeling which needs no kiln or oven is papier mache. You basically mix shredded paper with some adhesive like glue or starch. There are also lots of homemade versions of paper clay, cold porcelain and playdough where you mix flour or starch with something like glue, lotion, hair conditioner, dish soap etc and maybe add a little bit of oil to prevent the clay from sticking to the hands while modeling. For the moment, I still have a bunch of air drying clay to finish so I didn’t try any of these versions but I may in the near future, especially if I’ll do larger projects one day.
Have you tried any other malleable material which needs no kiln or oven to maintain its shape?

Sign up for updates and nothing more!
It is a good addition to my Sculpture Supply! Thanks for the Tip!
You’re welcome!